
Let me start by saying I really don’t like auto-installers. Yes, they make it very easy to install WordPress, but they have security risks and often install extras that aren’t needed.
For this tutorial, I’ll be using cPanel. Not all hosts use cPanel, but it should be easy enough to follow along as long as you have a file manager and database area.
[wps_table]
 |
[wps_youtube url=”https://youtu.be/4yeJYV2rnfw” width=”600″ height=”400″ responsive=”yes” autoplay=”yes”] |
[/wps_table]
I hate pop-ups… here’s my Newsletter Subscription form:
[wps_table style=”vertical-align:top;”]
Step 1: Download the latest version of WordPressDownload the latest version of WordPress at: https://wordpress.org/download/ |
|
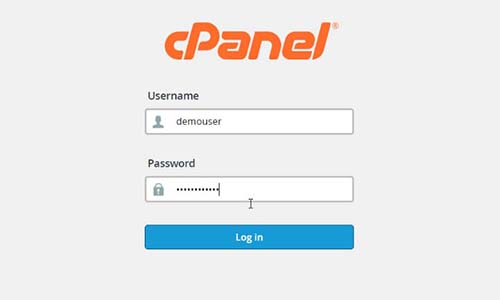
Step 2: Log into cPanelYour web host should have sent you an email with the login details. |
 |
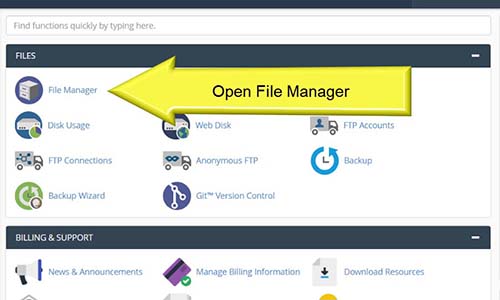
Step 3: Open File ManagerThis is where all of your website’s files are stored. |
 |
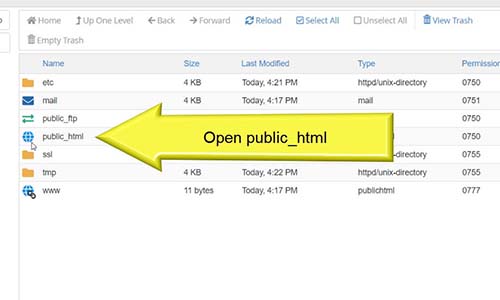
Step 4: Open public_htmlThis folder contains all the files that you share with the public. The other files are “hidden.” |
 |
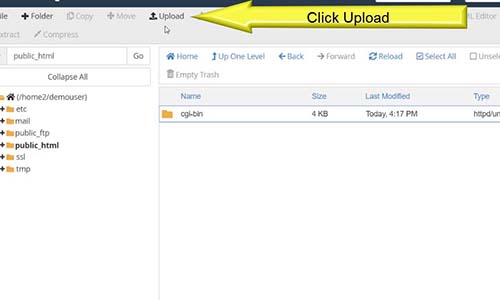
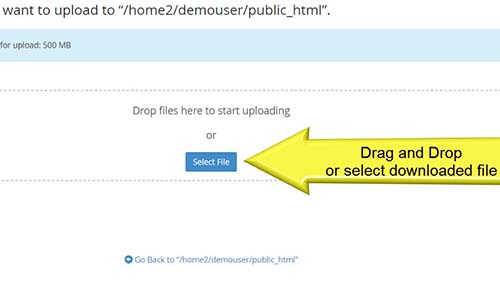
Step 5: UploadClick on the Upload button at the top of the page. You can see that you are in the public_html folder because it is in bold on the left. |
 |
Step 6: Upload WordPressUpload the .zip file you downloaded from WordPress.org/download |
 |
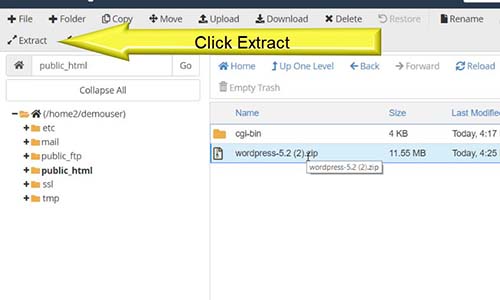
Step 7: ExtractClick once on the wordpress.zip file and then on the Extract button. Or, you can right click on the file and Extract will be an option. A pop-up will appear showing that the files were extracted. Close the pop-up. |
 |
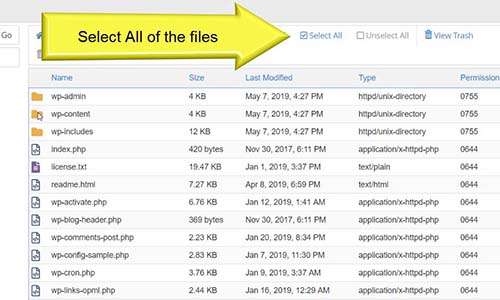
Step 8: Select the FilesAfter extraction, you will be taken back to the public_html folder. Enter the new folder called wordpress. Select all of the files by clicking the Select All button at the top of the page. |
 |
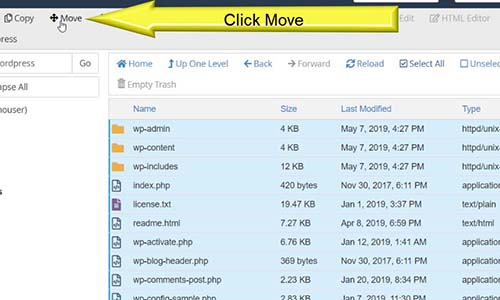
Step 9: Move the filesIf you want to use WordPress as your main website, you need to move all of the extracted files into your public_html folder. With all of the files selected, click on the Move button at the top of the page. |
 |
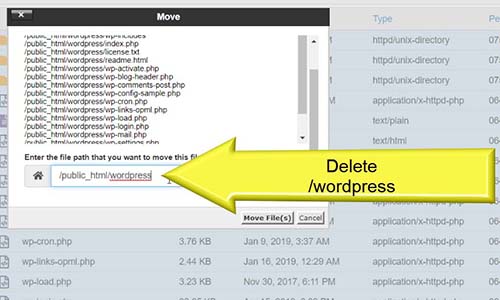
Step 10: Change the location of the filesThe files need to be moved from the wordpress folder to the public_html folder. In the box asking for the file path, remove /wordpress leave /public_html Once you’ve double checked that the path shows /public_html, click Move Files. |
 |
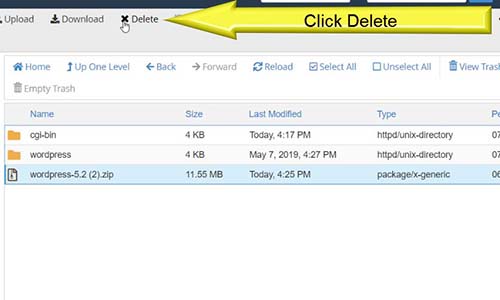
Step 11: Delete Unused FilesYour public_html will not look like the picture here. It will have many other files now. The two wordpress files here are no longer needed and can be deleted if you are comfortable doing so. |
 |
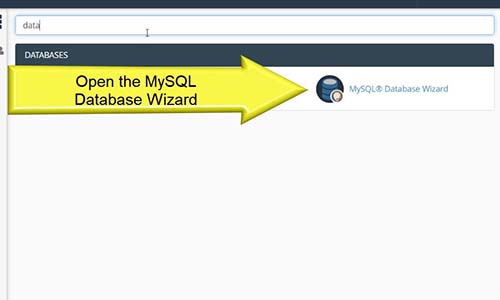
Step 12: Create a DatabaseHead back to the main cPanel page and find the MySQL Database Wizard. You can scroll down the page to find it or use the search bar at the top. |
 |
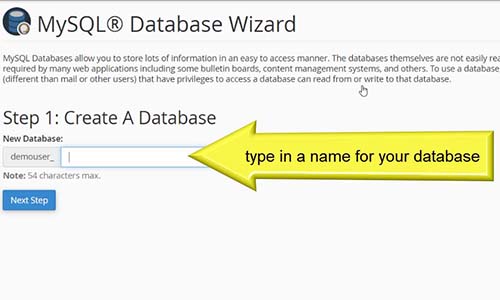
Step 13: Name the DatabaseThis is the database that WordPress will store information in. Auto-installers use wdps here, so I recommend something different for security reasons. I like using data or blog. |
 |
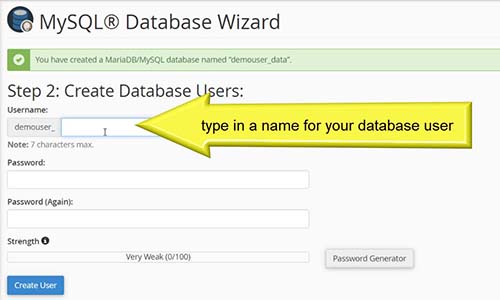
Step 14: Create a UserCreate a username for access to the database. This isn’t a username you’ll use on your site. Again, I like data or blog. Use the Password Generator to assign a password for this user. It needs to be a difficult password. Copy the password. |
 |
Step 15: Assign User PrivilegesThis tells your WordPress site what it is allowed to do. The easiest way to do this is to just give it all privileges. If you’re comfortable modifying databases, you can select only the options you need here. After clicking on Next Step, you’ll be shown a confirmation. Leave that page up, we’ll need it in the next steps. |
 |
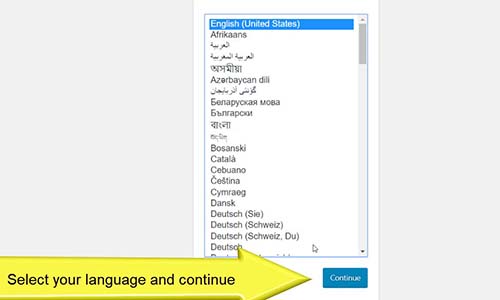
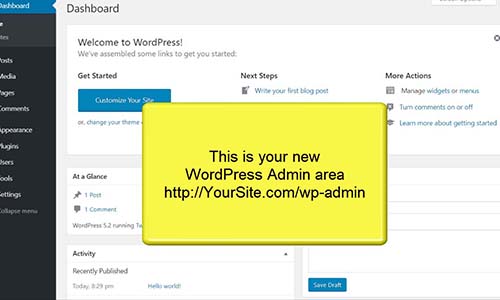
Step 16: Log into your AdminIn a new tab, head over to your website’s new administration area. http://yoursite.com/wp-admin Select your language and press continue. |
 |
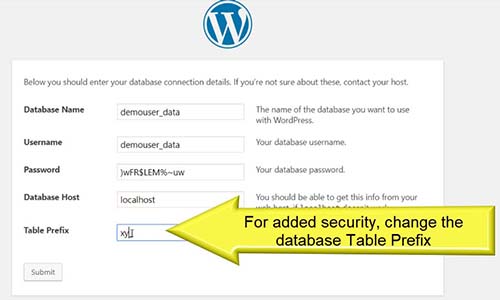
Step 17: Enter Database DetailsSwitch back and forth between this tab and the Database tab you left open to enter the information you setup in steps 14-16. For added security, change the wp_ prefix. I usually enter 2 random letters. |
 |
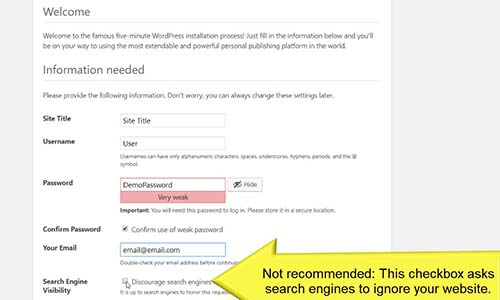
Step 18: Enter Your DetailsEnter the details for your new website. The Username and Password you create here will be used to log into your website. Use something that you’ll remember. The Username is difficult to change later if you aren’t comfortable with coding. DO NOT USE: admin Default Username is admin and is a big security risk to use. |
 |
Congratulations!!!Your new WordPress website is installed and ready to use! You can log into your administration area at: http://YOURSITE.COM/wp-admin |
 |
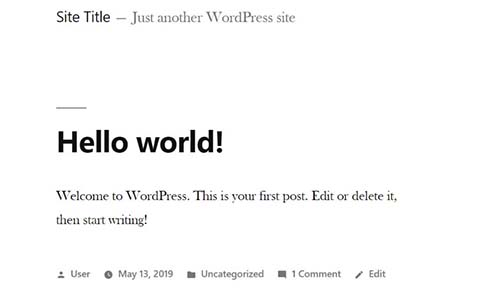
Your New WordPress BlogHere is the front default design. You can change this in the Appearance menu in your admin. |
 |

[/wps_table]